To get started, you will need:
Chocolate, such as Baker's Semi-Sweet Baking Squares
Heavy Whipping Cream
Cutting board
Good cutting knife, like a santoku blade
Large microwaveable measuring cup (you'll see why)
Medium sized heat proof bowl
Whisk
[Claps hands and rubs them together] Let's get going, shall we?
To make ganache, you must understand one thing: ratios. I know, it sounds scary, but trust me on this. All you really need to know is "one to one". If you're not familiar with ratios in regards to cooking, here's how it works: with 1:1, you take 1 part whipping and add it to one part chocolate. The "part" is whatever standard measurement you use. For example, I measured out 6 oz (3/4 cup) of whipping cream and used 6 oz (six squares) of chocolate. This makes a total of 12 oz of ganache, or 1 1/2 cups.
A note on chocolate: it is imperative you use either baking chocolate or a fine quality chocolate. Don't use chocolate chips and think you can get away with it. You need to have a high concentration of cocoa butter within the chocolate in order to make this work and chocolate chips don't have enough. They usually combine other ingredients like hydrogenated oils which don't produce a good ganache (not to mention those are just plain unhealthy). If cost is a contender in your chocolate choice, go with Baker's brand baking squares. I use the semi-sweet and it results in a smooth, luxurious ganache every time. Yes, Scharffen Berger is better, but Baker's is just fine and it usually retails for roughly $2 a box of 8 squares (8 oz).
If you're a chocolate connoisseur, you may be familiar with the term "bloom"; basically, it means that as chocolate ages and is exposed to humid air, it will begin to cloud, or bloom. This does not necessarily alter the taste of the chocolate, but it does shorten it's shelf life. In the picture above, the chocolate on the left is older than the chocolate on the right. It is always a good idea to store your opened chocolate in an airtight container and put it in a cool place to prevent it from going bad before it's time.
1. The first step to making ganache is to chop your chocolate. You don't need to mince it, but run your knife through it quickly and you should be ok. The idea is to increase the amount of surface area exposed to whipping cream; lots of little pieces=more surface area. Please be kind to yourself and use a good quality knife with a large, sharp blade to cut the chocolate. I use an 8" santoku blade and it works wonders.
2. Next, place your whipping cream in a large microwaveable measuring cup and microwave it on high for 1-3 minutes (microwaves will vary, so pay attention to yours). Make sure the vessel is twice the volume of what you're measuring, otherwise you might have an accident like mine:
Before...and after. Cleanup on aisle four!
3. Place the chopped chocolate in your heat proof bowl and slowly pour the hot whipping cream over the chocolate. Let it sit for about a minute or two.
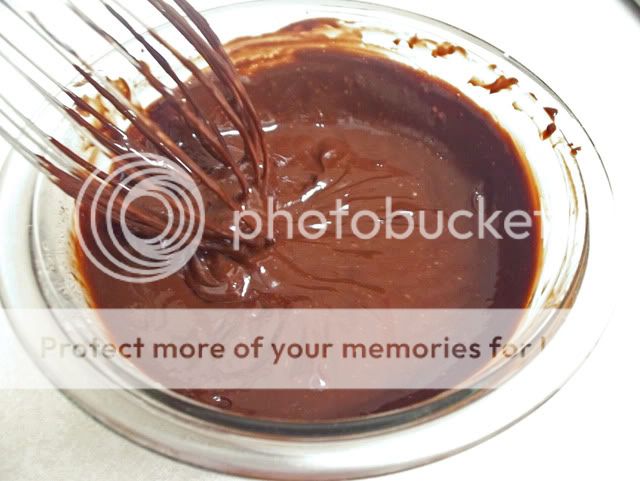
4. Take a whisk and slowly stir it, being careful not to splash it everywhere. It will eventually come together into a thick, glossy, chocolatey ooze.
L: What you'll start with. R: What you'll end up with. Yum!
5.And now you're done! If you will be pouring it onto a cake, allow it to cool for about 15 minutes on the counter. DON'T put it in the fridge or else it will coagulate and become unpourable. However, if you plan on whipping it to frost a cake, put it in the fridge for about 15-20 minutes, then add a touch of powdered sugar and whip that puppy on high with a mixer until you have the consistency you desire.
There you have it! See, now that wasn't so hard, now was it? You can experiment with different kinds of chocolate, even white chocolate (you may need to reduce the amount of whipping cream a little for white chocolate because it isn't true chocolate). You can also change up the ratio a bit depending on what you're doing. Some prefer a 2:1 whipping cream to chocolate ratio for pouring and some prefer a 1:2 whipping cream to chocolate ratio for making truffles (which will have to be another tutorial for another day).
Happy Baking,
Kelly


No comments:
Post a Comment
Note: Only a member of this blog may post a comment.