May is a very special month for me–not only do I celebrate my birthday every May, but my dad's, my father-in-law's, my husband's grandmother's, as well as several cousins and friends. What can I say? September was apparently a busy month! It is also the month in which I celebrate my wedding anniversary and this month's challenge is especially close to my heart because it was this very same cake that inspired my own wedding cake. My husband and I both share a love for medieval history and while our wedding appeared very traditional at first glance, everything was influenced and inspired by medieval culture and history. In fact, here's a little historical tidbit for you: the wedding cake as we know it comes from a medieval tradition in which wedding guests would bring small cakes and stack them up upon arrival. The bride and groom were then required to kiss over the top of said cakes and it was a good sign if none of the cakes were knocked over. Eventually, it morphed into the cake we know and love today. The croquembouche is about as close as you can get to that tradition and they are very common as wedding cakes in France. Our version were mini cheesecakes for the groom and Italian cream cake for the bride - our favorite flavors!
But I digress. This blog entry is about the croquembouche, or piece montee as Cat calls it. In a nutshell, it's a bunch of little cream puffs all stacked up on each other to form a tall mountain of creamy puffy goodness. Yum! You start by making a pate a choux (pronounced 'pot ah shoe')which are the puffs. You then make a cream filling and fill the puffs. Finally, you use a glaze to glue them all together and voila! Croquembouche.
While pate a choux sounds fancy and super complicated, I'm here to tell you it's not. I first made pate a choux when I was a senior in high school and it was easy then! We all know that I ADORE Alton Brown. Well, he produced an episode devoted solely to pate a choux and explained it's workings in and out (tee hee). If you still won't take my word that making pate a choux is easy, take his. I had to use the recipe that Cat provided, but I used Alton's method. Here's my pate a choux:
Pate a Choux (Yield: About 28)
¾ cup (175 mL) water
6 TBSP (85 g) unsalted butter
¼ tsp salt
1 TBSP sugar
1 cup (125 g) all-purpose flour
4 large eggs
1. Preheat oven to 425F degrees and line two baking sheets with parchment paper.
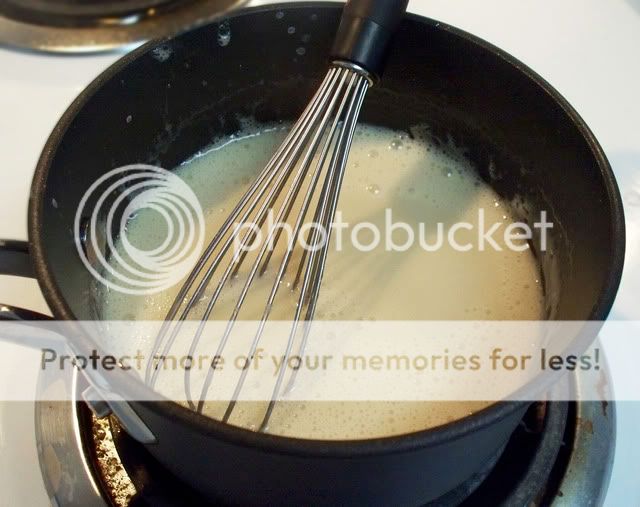
2. Combine the water, butter, salt and sugar in a saucepan over medium heat. Bring to a boil and stir occasionally. At boiling, remove from heat and sift in the flour, stirring to combine completely.
3. Return to heat and cook, stirring constantly until the batter dries slightly and begins to pull away from the sides of the pan (see below; this happens very quickly actually).
4. Transfer to a bowl and stir with a wooden spoon 1 minute to cool slightly.
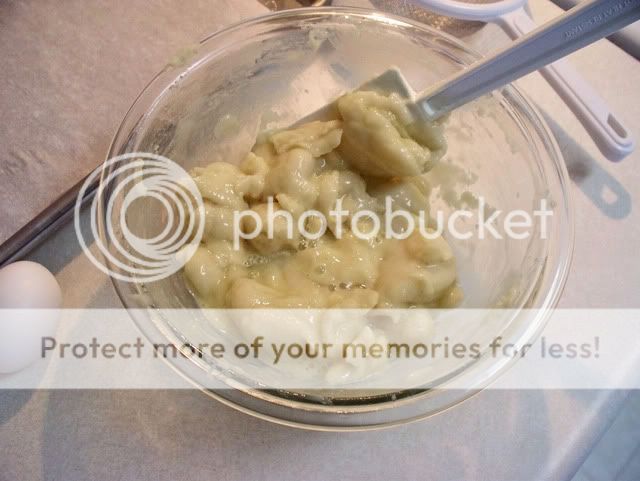
After adding an egg. It's gets really weird looking, but it will come together, I promise!
5. Add one egg. The batter will appear loose and shiny. As you stir, the batter will become dry-looking like lightly buttered mashed potatoes. It is at this point that you will add in the next egg. Repeat until you have incorporated all the eggs.
The batter will look like this when it is ready.
6. Transfer batter to a pastry bag fitted with a large open tip (I piped directly from the bag opening without a tip). Pipe choux about 1 inch-part in the baking sheets. Choux should be about 1 inch high about 1 inch wide. Using a clean finger dipped in hot water, gently press down on any tips that have formed on the top of choux when piping. You want them to retain their ball shape, but be smoothly curved on top.
I'd recommend just piping big balls instead of swirling it like I did. I think that is partly why that batch fell so much.
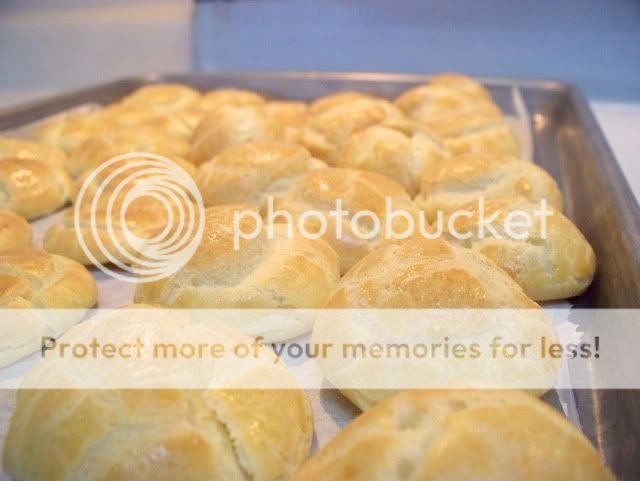
7. Brush tops with egg wash (1 egg lightly beaten with pinch of salt) and bake the choux at 425F degrees until well-puffed and turning lightly golden in color, about 10 minutes. Lower the temperature to 350F degrees and continue baking until well-colored and dry, about 20 minutes more. Remove to a rack and cool.
Some food for thought...
- These will keep overnight in an airtight container. You can freeze them as well, but make sure they are unfilled when you freeze them!
- Be sure you let these little guys dry completely; it is better to err on the side of overdone than underdone. If there is any moisture left inside them, they will sink and flatten, thus rendering them un-fillable. At that point, they're really only good for munching, which is what happened to most of mine!
Having completed the tiramisu challenge back in February, the cream filling was a cinch. I didn't have any actual lemons, so I used lemon extract instead which left a lovely lemony zing to the filling.
Here's the vanilla pastry cream recipe again:
Vanilla Pastry Cream
1/4 cup (55g) sugar
1 TBSP (8g) all purpose flour
1/2 tsp finely grated lemon zest
1/2 tsp vanilla extract
1 large egg yolk
3/4 cup whole milk
- Mix together the sugar, flour, lemon zest and vanilla extract in a medium heavy-bottomed saucepan. To this add the egg yolk and half the milk. Whisk until smooth.
- Now place the saucepan over low heat and cook, stirring constantly to prevent the mixture from curdling.
- Add the remaining milk a little at a time, still stirring constantly. After about 12 minutes the mixture will be thick, free of lumps and beginning to bubble. (If you have a few lumps, don’t worry. You can push the cream through a fine-mesh strainer.)
- Transfer the pastry cream to a bowl and cool to room temperature. Cover with plastic film and refrigerate at least 4 hours or overnight, until thoroughly chilled.
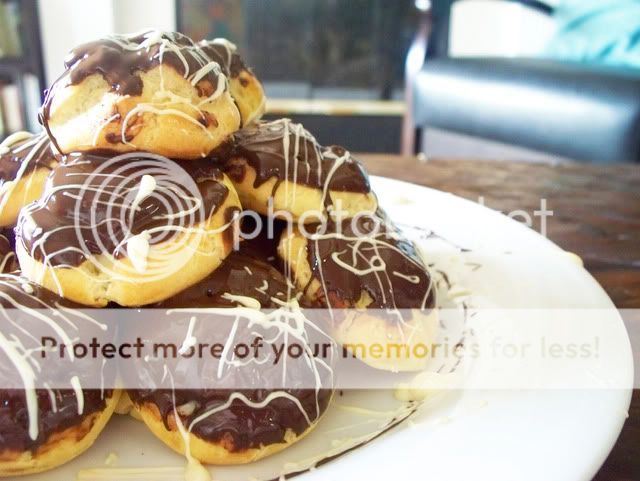
Then I dipped each and every single filled puff in melted chocolate and let them dry a bit and finally, I glued them all together to form my mountain of puffs. All I did was finely chop some Baker's semi-sweet chocolate and melt it in the microwave for a minute to create my glaze.
Then do a little stacking and "gluing"...
I stacked the flat ones in the center to build the puffier ones around it. Even without the filling, they were tasty!
And voila! Croquembouche. I drizzled a little melted white chocolate on top to gild the lily a bit. Tres magnifique!
Life is sweet. Here's to four years of marriage and the big 2-8! Also, Happy Birthday to my dad, Carl, Mike Sr., Gracie, Gramma Bobbe, Michael K, Emily and anyone else who I've forgotten! The month of May rocks!
Happy Baking,
Kelly


Yummy! I can't wait to try this! These sound wonderful and if the truth be told I am too cheap to buy a cream puff when I know they most likely are going to taste nasty anyway. I am so excited to give this a go! I am doing a tea party for 35 ladies this weekend and I might need to put these with the desserts. Thanks For Sharing!
ReplyDelete