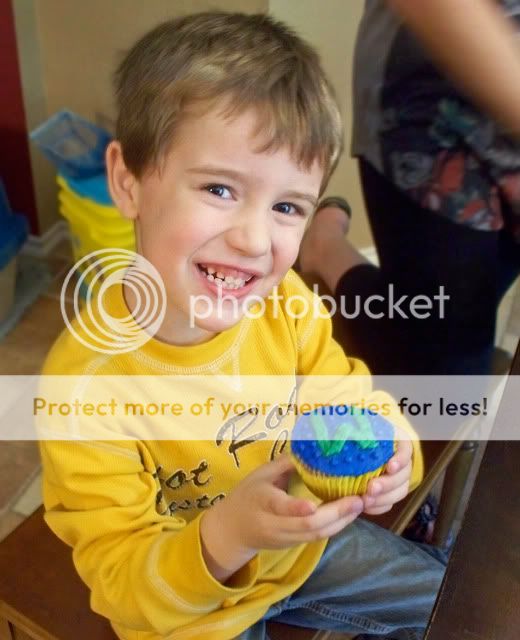
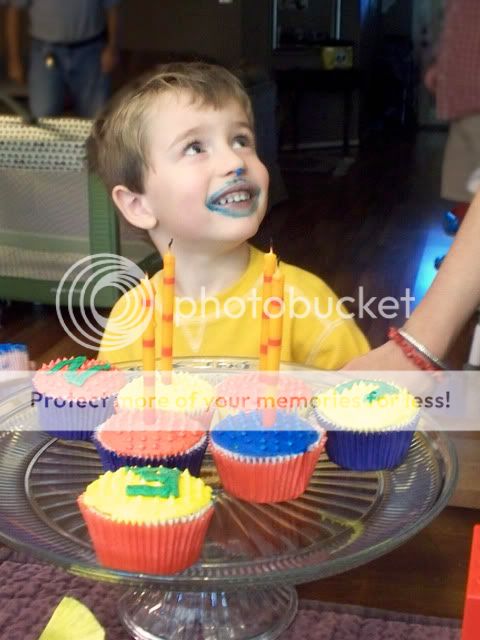
My high school gal pal Michelle is a very talented photographer and her twin boys turned three this week! I've been wanting to do some family photos and she needed some cute birthday cakes, so we made an even trade.
Her boys Ian and Aaron are two of the most adorable, sweetest little boys ever, but their one drawback (as far as I can tell!) is that they fight over anything that they don't have. For example, if one of them has a red car and the other shows up with a blue car, they fight over the blue car, even if it's the same darn car, just different colors. I totally get why so many twins are dressed the same, or have the same toy! So their mom was adamant on having IDENTICAL cakes. Believe me, nothing is worse than seeing a three year old throw a tantrum (I know from LOTS of experience, lol), so I was happy to oblige.
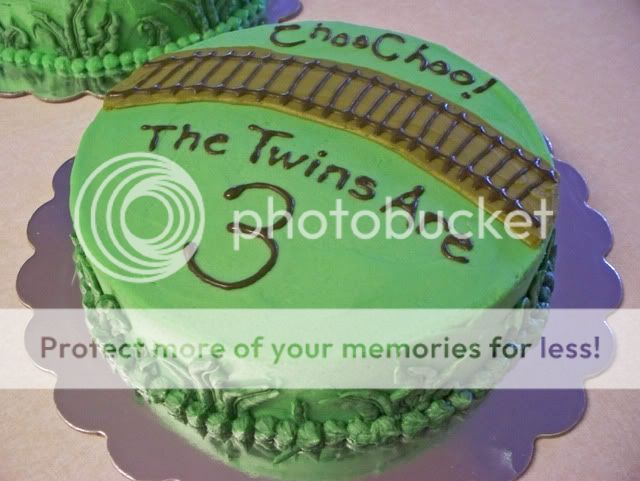
Since Michelle was going to get the boys Thomas the Train toysets for their birthday anyway, she asked me to do cakes that a toy train could be set on top of. Here's what I came up with:
I am very proud of these, because there is not one bit of fondant on them and my buttercream work came out pretty well! I'm no Twinkie yet, but maybe someday! It's always good to challenge yourself and try to master a skill set.
I asked Michelle to send me pictures of the cakes when they have trains on them and I'll try and post those here when they come in. In the meantime, a very happy birthday to Ian and Aaron!
Happy caking,
Kelly
Showing posts with label Kids Birthday Cakes. Show all posts
Showing posts with label Kids Birthday Cakes. Show all posts
Friday, April 15, 2011
Sunday, April 10, 2011
Portfolio: Car Cookies and Cupcakes
It was bumper to bumper traffic in my kitchen this weekend!
A gal I went to high school with asked me to do some car themed cupcakes and cookies for her son's 3rd birthday party. We kept things simple with chocolate and vanilla cupcakes with blue and orange swirled icing on them. For favors, I decorated car cookies to match. Everything came out bright and beautiful and fun!
Happy birthday, Caden! May you have many more to come!
Happy baking,
Kelly
Labels:
Cookies,
cupcakes,
Kids Birthday Cakes
Wednesday, February 23, 2011
Happy 3rd Birthday Billa!
My daughter celebrated her third birthday on Monday. Cue the sniffling and crying...she's getting to be so big!
We've decided to hold her birthday party about two weeks later than her birthday, but we wanted her friends at school to celebrate anyway. I whipped up some cookies for goodie bags and some homemade green and blue oreos for the kiddos to munch on after lunch for a mini party.
I fell in love with a recipe for homemade oreos at my friend Anna's cookie party that uses cake mix, oil and eggs. It's super easy and pretty darn tasty too! The original recipe is here at The Sister's Cafe, where Anna snagged it, but instead of using the devil's food cake recipe, I used white cake mix and then dyed the batter in different colors. It was easy and as you can see above, it made quite the impact! Did I mention that it was easy? [wink]
The pictures above show you the different things you can do with the batter. It's pretty thick once it's all mixed up, which made me think that I could maybe roll it out like cookie dough. Yeah, not so much. It's a little too oily for my taste when rolling (probably because it was white cake mix instead of chocolate...I bet the cocoa powder has something to do with it) and it stuck like crazy to the counter. It also didn't hold the shape very well when I tried to peel it up off my floured surface. Grrr. Either way, the cookies came out alright in the end and there were none left when I picked up Billa from school.
Homemade Oreos
Some food for thought...
Happy Baking,
Kelly
Sybilla enjoying one of her fave foods, "cheese pops" while watching Busytown on Netflix. They're actually Cheetos Brand Natural White Cheddar Puffs (those things are like crack...super addictive!)
We've decided to hold her birthday party about two weeks later than her birthday, but we wanted her friends at school to celebrate anyway. I whipped up some cookies for goodie bags and some homemade green and blue oreos for the kiddos to munch on after lunch for a mini party.
Here are the cookies I made for the goodie bags. The kids love these things so much!
The goodie bag cookies were simply sugar cookies that I decorated in Scooby colors: aquamarine, lime green, and orange. I had thought about getting crazy and making some Mystery Machines or trying to recreate Scooby's head, but I ended up not doing it. To be honest, it was way too much work for a small of three and two year olds. I think the shapes I chose ended up being much more kid-friendly.
These were the cookies I made for the kids to eat at the mini party. The flower one I made special for Sybilla. I dyed them to coordinate with the goodie bags and the Scooby color theme!
I fell in love with a recipe for homemade oreos at my friend Anna's cookie party that uses cake mix, oil and eggs. It's super easy and pretty darn tasty too! The original recipe is here at The Sister's Cafe, where Anna snagged it, but instead of using the devil's food cake recipe, I used white cake mix and then dyed the batter in different colors. It was easy and as you can see above, it made quite the impact! Did I mention that it was easy? [wink]
The dots were really a test to see how the doughs would bake together. They actually looked kinda cute!
Like, what is it Scoob!? Tie dye and flowers, oh my!
The pictures above show you the different things you can do with the batter. It's pretty thick once it's all mixed up, which made me think that I could maybe roll it out like cookie dough. Yeah, not so much. It's a little too oily for my taste when rolling (probably because it was white cake mix instead of chocolate...I bet the cocoa powder has something to do with it) and it stuck like crazy to the counter. It also didn't hold the shape very well when I tried to peel it up off my floured surface. Grrr. Either way, the cookies came out alright in the end and there were none left when I picked up Billa from school.
Homemade Oreos
1 package cake mix, white or devil's food
2 eggs
1/2 cup oil (reduce this amount just slightly for white cake mix)
2 eggs
1/2 cup oil (reduce this amount just slightly for white cake mix)
food coloring as needed
- Heat oven to 300-350F degrees and line baking sheets with parchment.
- Add oil, eggs and coloring (if using) to cake mix and blend together.
- Roll dough into balls (a little larger than a quarter). Place on greased cookie sheet and press down gently.
- Bake for 8 minutes. Remove from oven and let cool on sheet for a few minutes before moving them to a cooling rack.
- To assemble the cookies, add a small dollop of filling into the center of one cookie. Place another cookie similar in size on top of the filling. Lightly press them together, working the filling evenly to the outsides of the cookie. Continue this process until all the cookies have been sandwiched with cream.
Cream Cheese Filling
1/2 cup butter (1 stick)
1 block of cream cheese (8 oz)
3 - 4 cups powdered sugar (depending on desired consistency)
1 tsp vanilla extract
Cream butter and add cream cheese and mix well. Add powdered sugar slowly until you reach your desired consistency.
1/2 cup butter (1 stick)
1 block of cream cheese (8 oz)
3 - 4 cups powdered sugar (depending on desired consistency)
1 tsp vanilla extract
Cream butter and add cream cheese and mix well. Add powdered sugar slowly until you reach your desired consistency.
Some food for thought...
- If you use a white cake mix and color it, use a bit more color than you think you might need. As the cookies baked, the colors seemed to fade a bit. Boo :o(
- I didn't realize this until it was too late, but you need to watch these like hawks to prevent too much browning on the edges. The sugar in the batter caramelizes as it cooks, giving the brown color. I think the best way to combat this is to bake them low and slow: cook at 300F for about 12 minutes and go from there. I baked mine at 325 for 10 minutes and I think that was too much.
- Chilling the dough will work wonders if you're going to attempt shapes like the flower. Try to handle it as little as possible too, so that it doesn't 'melt' in your hands.
- If you wanted to jazz these puppies up even more, try adding sprinkles! You can also (gently) swirl the doughs together to create tie dye, or place small balls together like the flower to create other shapes. The possibilities are endless!
- A recipe note: in order to make sure that the batters were evenly divided, I measured the bag of mix before splitting it, then split the eggs and oil down the middle. You could just mix the entire batch together and then separate and color, but due to the thickness of the dough, that may actually be harder.
Happy Baking,
Kelly
Labels:
Cookies,
Kids Birthday Cakes,
recipe,
Whoopie Pies
Saturday, January 29, 2011
Portfolio: Raggedy Ann Birthday Cake and Cupcakes
Last year my friend Caroline asked me to make her a Hungry Little Caterpillar cupcake cake for her daughter's first birthday. This year, she decided to do a Raggedy Ann theme! I remember Raggedy Ann being a big deal when I was a kid, and it's really nice to see her come back. Good wholesome fun!
I did my usual Google image search for inspiration and saw a really cute idea that someone had done where they did the head and shoulders for Raggedy Ann and used red licorice for her hair. I'm really into using candy and other tasty treats for accents and decor on cakes, so it seemed like a perfect fit. And here is the final result:
For the head, I baked two six inch layers and for the shoulders I used one 10 inch layer, cut in half and stacked on top. I ended up doing a dozen cupcakes as well, just in case more people showed up at the party. I frosted everything in buttercream but used fondant for the white pinafore, the eyes, and the nose. The cake itself is marbled chocolate and vanilla, since per Caroline, "Madeline could eat Starbucks' marbled pound cake every day of her life and never get tired of it!"
The Divine Miss M (as I like to call her) LOVED her cake and enjoyed playing with all of her friends' on the playscape. I was thrilled with the cake and so happy to provide an important part of a special day for a very special little girl.
Happy Birthday, Madeline...may you have many more, my dear!
Happy Baking,
Kelly
I did my usual Google image search for inspiration and saw a really cute idea that someone had done where they did the head and shoulders for Raggedy Ann and used red licorice for her hair. I'm really into using candy and other tasty treats for accents and decor on cakes, so it seemed like a perfect fit. And here is the final result:
Please ignore my reflection in the cakeboard...I didn't even realize it was there until much later!
For the head, I baked two six inch layers and for the shoulders I used one 10 inch layer, cut in half and stacked on top. I ended up doing a dozen cupcakes as well, just in case more people showed up at the party. I frosted everything in buttercream but used fondant for the white pinafore, the eyes, and the nose. The cake itself is marbled chocolate and vanilla, since per Caroline, "Madeline could eat Starbucks' marbled pound cake every day of her life and never get tired of it!"
The Divine Miss M (as I like to call her) LOVED her cake and enjoyed playing with all of her friends' on the playscape. I was thrilled with the cake and so happy to provide an important part of a special day for a very special little girl.
Happy Birthday, Madeline...may you have many more, my dear!
Happy Baking,
Kelly
Labels:
cupcakes,
Kids Birthday Cakes,
Portfolio
Monday, October 18, 2010
Portfolio: Lego Cupcakes
My best friend's son Cameron celebrated his 4th birthday this weekend and he is a super Legohead. They've opened up a Lego store here in Austin now, and since Cameron was having a very small party, we decided to do cupcakes with a Lego theme. Cameron is usually a chocolate fiend, but when presented with several flavor options, he chose strawberry cupcakes with chocolate frosting. Yum!
After baking a dozen strawberry cupcakes, I frosted the tops with brightly colored buttercream, keeping the level pretty even. That was the easy part. I then piped tiny dots on each surface to simulate a Lego brick base. If you've ever played with Legos, you know what I'm talking about:
After the tops were done, I then took a flat tip to create some Lego pieces that spelled out the letters of Cameron's name. Our original idea was to place candy shaped like Lego bricks on top, but we couldn't find on such short notice and using real Legos meant cleaning them afterwards, which was not a fun prospect.
Cameron was thrilled with the results and we had a great time playing with Legos at the party. Happy birthday, buddy! We love you!
Happy Caking,
Kelly
After baking a dozen strawberry cupcakes, I frosted the tops with brightly colored buttercream, keeping the level pretty even. That was the easy part. I then piped tiny dots on each surface to simulate a Lego brick base. If you've ever played with Legos, you know what I'm talking about:
After the tops were done, I then took a flat tip to create some Lego pieces that spelled out the letters of Cameron's name. Our original idea was to place candy shaped like Lego bricks on top, but we couldn't find on such short notice and using real Legos meant cleaning them afterwards, which was not a fun prospect.
Cameron was thrilled with the results and we had a great time playing with Legos at the party. Happy birthday, buddy! We love you!
Everyone was wearing their Legos by the end of the party! Meet Cap'n Bluebeard :o)
Happy Caking,
Kelly
Labels:
cupcakes,
Kids Birthday Cakes,
Portfolio
Saturday, September 25, 2010
Portfolio: Owl Birthday Cake
It's owl-ficcial: owls are hot, hot, hot! Ok, apologies for the pun. I couldn't resist!
Recently I was contacted by a gal to do a birthday cake for her son's first birthday. She loved the design I had come up with for the YMCA cake I did for my friend Julia a few months back. I gotta say, I love it too! It's simple and yet it makes a great statement. We decided on a larger marble cake for the guests and a vegan peach cake for the birthday boy, Mateo. Here is the final result:
The larger cake is marbled chiffon cake on the inside. I dyed the vanilla portion a baby blue to match the party decor and it looked beautiful with the chocolate.
The smash cake came out way cuter than I expected. I had to bake it twice however as something happened with my recipe the first time (I was trying to cut my normal recipe in half and I think I added too much flour). Second time's the charm, right? The birthday boy's mom had asked for a healthier version of cake for her son, and I love the vegan recipe I use because the amount of sugar can be cut down considerably since it uses a fruit puree. Peaches was the flavor of the day since it's Mateo's favorite. The small domed cake pan I used created the most adorable little owl; it reminds of me of pygmy owls!
All in all, I am very pleased with the results and so was Mateo and his mom! Happy 1st birthday Mateo; may you have many more, cutie!
Happy Caking,
Kelly
Recently I was contacted by a gal to do a birthday cake for her son's first birthday. She loved the design I had come up with for the YMCA cake I did for my friend Julia a few months back. I gotta say, I love it too! It's simple and yet it makes a great statement. We decided on a larger marble cake for the guests and a vegan peach cake for the birthday boy, Mateo. Here is the final result:
The larger cake is marbled chiffon cake on the inside. I dyed the vanilla portion a baby blue to match the party decor and it looked beautiful with the chocolate.
I used special food writing markers to write the wording and make the feathers on the owl's chest. I can't believe I didn't invest in these things sooner...they were worth every penny!
The smash cake came out way cuter than I expected. I had to bake it twice however as something happened with my recipe the first time (I was trying to cut my normal recipe in half and I think I added too much flour). Second time's the charm, right? The birthday boy's mom had asked for a healthier version of cake for her son, and I love the vegan recipe I use because the amount of sugar can be cut down considerably since it uses a fruit puree. Peaches was the flavor of the day since it's Mateo's favorite. The small domed cake pan I used created the most adorable little owl; it reminds of me of pygmy owls!
Isn't this little guy so sweet? I love the domed pan I used for this...it's so versatile!
All in all, I am very pleased with the results and so was Mateo and his mom! Happy 1st birthday Mateo; may you have many more, cutie!
Happy Caking,
Kelly
Labels:
Birds,
Kids Birthday Cakes,
Portfolio
Monday, August 30, 2010
Portfolio: Hugs and Stitches Birthday Cake
I had the pleasure this past weekend to make a birthday cake for a little girl's first birthday. Her mom Juleah had chosen a theme based on a line of partyware called "Hugs & Stitches". It's really very cute, with little flowers, butterflies, and lots of pastel colors and various patterns.
Juleah asked for a sheet cake which I made from vanilla cake with vanilla buttercream. On top, I mimicked the partyware design and created a parti-colored backdrop with mint green, butter yellow, and lilac. Using fondant as accents, I added in a large '1', a butterfly, and a flower. I rolled out pink fondant and cut it freehand in a wavy pattern to wrap around the sides. The proverbial icing on the cake was the stitching I added in blue, which tied everything together!
Here is the smash cake, which I coated in butter yellow and then piped on an M (the birthday gal's name is Madelyn) and added fondant flower cutouts. I love this smash cake. It's so girly and feminine without being in your face pink!
Happy first birthday, Madelyn! May you have many more!
Happy baking,
Kelly
Juleah asked for a sheet cake which I made from vanilla cake with vanilla buttercream. On top, I mimicked the partyware design and created a parti-colored backdrop with mint green, butter yellow, and lilac. Using fondant as accents, I added in a large '1', a butterfly, and a flower. I rolled out pink fondant and cut it freehand in a wavy pattern to wrap around the sides. The proverbial icing on the cake was the stitching I added in blue, which tied everything together!
I wish the picture had come out better...I totally forgot to take a picture at home and my daughter and husband were waiting in the car, so I had to hustle!
Here is the smash cake, which I coated in butter yellow and then piped on an M (the birthday gal's name is Madelyn) and added fondant flower cutouts. I love this smash cake. It's so girly and feminine without being in your face pink!
Happy first birthday, Madelyn! May you have many more!
Happy baking,
Kelly
Labels:
Kids Birthday Cakes,
Portfolio
Wednesday, August 18, 2010
Portfolio: Pink Zebra Birthday Cake
Hello everyone!
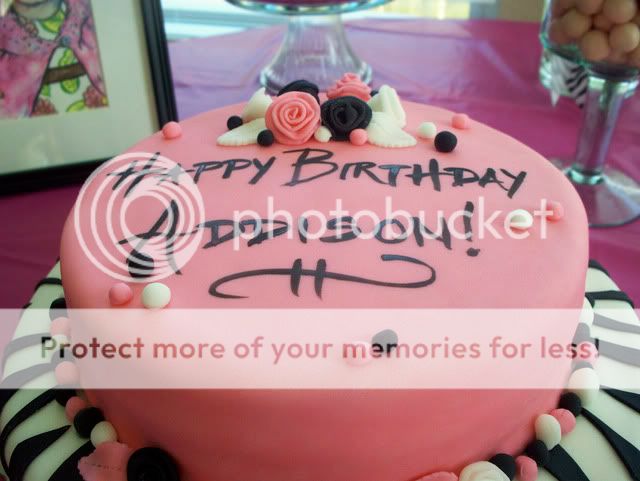
Today I had the pleasure of delivering an adorable pink and zebra patterned cake for a lucky little girl! Addison turned one and her mom picked a cute theme of pink with zebra accents since her folks are "wild about her!" I wish I had taken a picture of Addison's mom; she's 22 weeks pregnant and looked cute as a bug in her black sundress with hot pink mardi gras beads!
The cake was vanilla with strawberry filling and buttercream icing. I made a small smash cake to go along with it, but I totally forgot to take a picture of it. It was solid pink with black polka dots on the side, a black pearl border, and an 'A' on top piped to look like it was made from zebra print.
I had a lot of fun making this little beauty and I was very thrilled with how it came out. Happy first birthday, Addison...may you have many more!
Happy Caking,
Kelly
Today I had the pleasure of delivering an adorable pink and zebra patterned cake for a lucky little girl! Addison turned one and her mom picked a cute theme of pink with zebra accents since her folks are "wild about her!" I wish I had taken a picture of Addison's mom; she's 22 weeks pregnant and looked cute as a bug in her black sundress with hot pink mardi gras beads!
Here's a side view of the cake...I really like using those mirrored scalloped boards! Not only are they clean looking, but if you have fun pattern or texture, the mirror effect emphasizes it.
A full shot of the cake. I crafted ribbon roses in white, pink, and black along with lots of fondant "beads." I like to think that this was what a stylin' little girl's jewelry box would be like.
The cake was vanilla with strawberry filling and buttercream icing. I made a small smash cake to go along with it, but I totally forgot to take a picture of it. It was solid pink with black polka dots on the side, a black pearl border, and an 'A' on top piped to look like it was made from zebra print.
My painting on fondant has gotten much better...I was very pleased with the script I created for this "wild" cake.
I had a lot of fun making this little beauty and I was very thrilled with how it came out. Happy first birthday, Addison...may you have many more!
Happy Caking,
Kelly
Labels:
Kids Birthday Cakes,
Portfolio
Saturday, March 13, 2010
Portfolio: Littlest Pet Shop Cake
It's been a little while since I posted; I spent almost every weekend for six weeks baking and making cakes and I desperately needed a break! I also needed to do some spring cleaning and my bedroom, closet, and master bathroom are now sparkling and organized. [Happy sigh] Nothing makes me think better than a clean space! And now that I am somewhat rested (because being mom to a rambunctious two year old is never restful) I wanted to show you the latest creation in my portfolio that was made for Sydney, who lives next door to our friends Madeleine and Cameron. For her birthday, she requested a Littlest Pet Shop (LPS) cake that was based off my lovebirds cake.
Labels:
Fondant Creations,
Kids Birthday Cakes,
Portfolio
Sunday, February 21, 2010
Happy Birthday Sybilla!
Today my daughter Sybilla is two years old, which means that Billa Cakes is two years old too. Well, technically, Billa Cakes wasn't born until about two or three months after my daughter was born, when I took that life-changing drive to work. But I digress! To celebrate my munchkin's second birthday, we had a Sesame Street themed party. I made four dozen cupcakes, each dozen representing a different Sesame character.
Monday, February 15, 2010
Portfolio: Valentine's Day Cakes and Cookies
Ah, for the love of cake...it was Valentine's Day yesterday and I made a lovely batch of goodies to celebrate! Hannah is the daughter of a former coworker who turned 6 this year and her original birthday plan was for a spa themed Barbie party. But then she saw an American Girl doll she really wanted instead, so she opted for the doll and a less elaborate cake. Her mom is an event planner for a huge real estate company and between all the planning for their annual event and her daughter's birthday, I am still amazed at how well Stormi keeps it together. Here is what we came up for Hannah's party:
Labels:
Holidays,
Kids Birthday Cakes,
Portfolio
Sunday, January 31, 2010
Portfolio: Hungry Little Caterpillar Cupcakes
On Saturday I posted about a cake I did for my friend's daughter Madeleine. Her cake was one of two I did this weekend; the other was for another little girl named Madeline, the daughter of another friend (and I really wish that both of their names were spelled the same way so that it wouldn't make my brain hurt as much when trying to type them out!). Madeline's first birthday is tomorrow and to celebrate, her mama requested cupcakes done up like the Hungry Little Caterpillar. It's one of my daughter's favorite books, so this was a really fun project for me on so many levels (shoot, this whole weekend was full of fun baking projects).
The leaf cake board is a piece of foam board that I cut into a leaf shape and then used a large tip brush to apply watered down acrylic paint in large strokes. It created a watercolor type effect that matches the book's illustrations really well.
Labels:
cupcakes,
Kids Birthday Cakes,
Portfolio
Saturday, January 30, 2010
Portfolio: Flower Cake
What a weekend! I had two cakes this weekend, both for little girls named Madel(e)ine! (Their names are spelled slightly different, hence the 'e' in parentheses within the name, FYI) My best friend's daughter Madeleine had wanted a Tinkerbell cake for her birthday last year, but then she decided that it wouldn't match with her bowling party, so instead we did a pink bowling cake. (Yeah, I know, I never expected that from a four year old, but considering that my daughter is just as precocious as Madeleine, I better get prepared!) Needless to say, I wasn't surprised to hear Madeleine ask for another Tinkerbell cake this year. I had to take into consideration that this party is for about 8-10 little girls, so I settled on a 9" two layer round cake, single tier. Madeleine's family doesn't mind fondant, but they aren't the biggest fans, so I tried to keep it to a minimum on the design.
Labels:
Kids Birthday Cakes,
Portfolio
Sunday, January 24, 2010
Portfolio: Basketball Cake
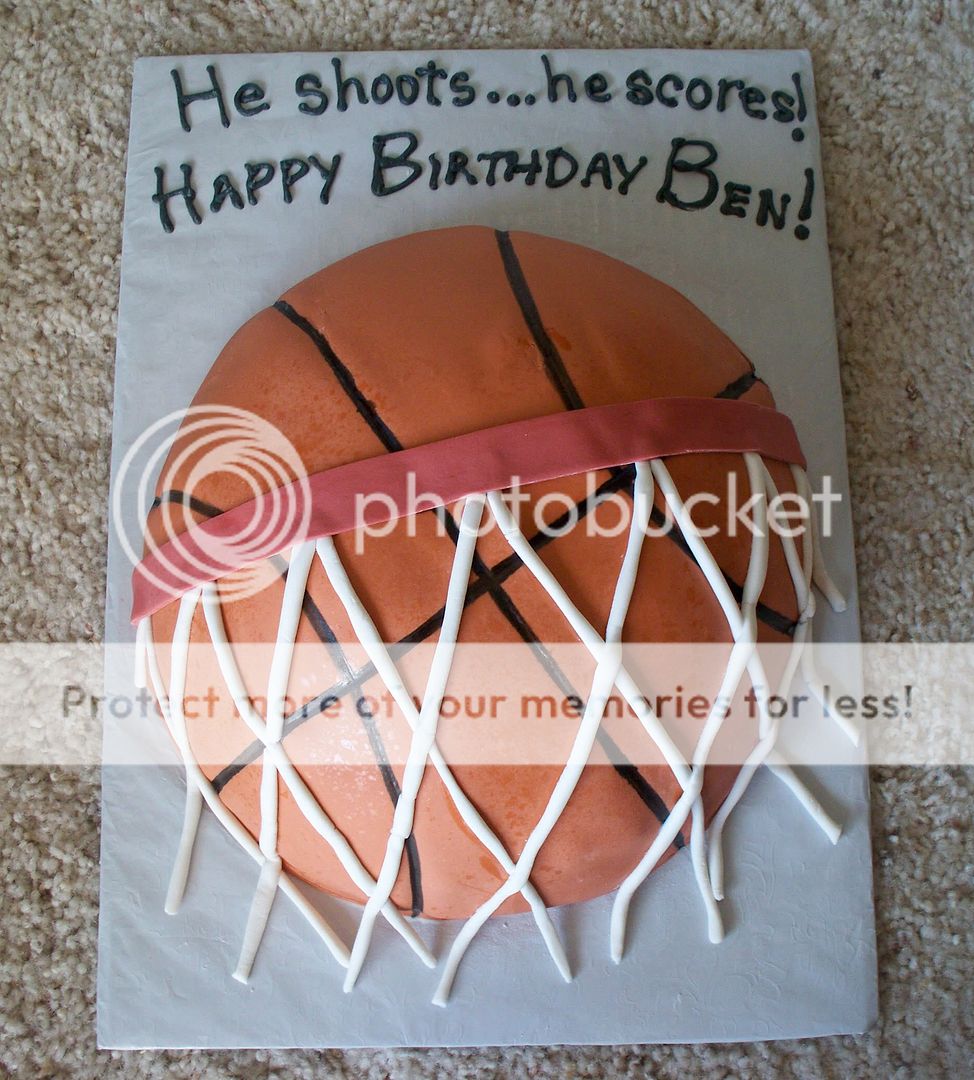
It's becoming very apparent that as "Auntie" to lots of my friends' kids, I am also their fairy cakemother. Today we celebrated Ben's 7th birthday and true to fairy cakemother form, I made his cake for him again this year. He had originally requested a Bumblebee Transformer cake, but in the end he chose to go with a sports theme again. Right now he plays basketball so I made a three dimensional basketball out of chiffon cake using my Wilton sports ball mold.
Labels:
Kids Birthday Cakes,
Portfolio,
Sports
Saturday, January 16, 2010
Portfolio: Bug Birthday Cakes
Howdy folks!
Before the holidays got swingin', I was asked to make some smash cakes for a set of fraternal twins who were turning one! I didn't post about them then since I forgot to take my camera and had to use my phone to take the picture of the cakes and I FINALLY uploaded them this week (I know, little Ms. Tech Geek here didn't know how to upload photos from a phone!).
The birthday mom was doing a party theme based on a book that featured a ladybug and a bumblebee, so the cakes I made coordinated with the theme. It was a small family only gathering, so she didn't want anything too large.
I achieved the look of these cakes by using cupcakes and a specialty pan that I found the week before at All in One Bake Shop. I've said it once, and I'll say it again, I don't normally like to use specialty pans because they're one hit wonders; you can only usually them for one character or design. There are some though, that a baker should get and have in their personal stock for specialty cakes. This dome shaped pan is perfect because it can be used to create many different things.
Because I only bought one pan (I had to make sure it would work), I had to bake and complete each cake separately which increased the amount of time I spent on baking. But it was worth it as I could have never achieved such a perfect dome by carving. Sometimes a specialty pan is worth the cost and cupboard space just to save some time and a little bit of frustration!
In the end, I think it was worth the $6 I spent on the pan as it made these smash cakes a breeze. And the mom was thrilled with the cakes as were the twins' older brothers!
Happy Baking,
Kelly
Before the holidays got swingin', I was asked to make some smash cakes for a set of fraternal twins who were turning one! I didn't post about them then since I forgot to take my camera and had to use my phone to take the picture of the cakes and I FINALLY uploaded them this week (I know, little Ms. Tech Geek here didn't know how to upload photos from a phone!).
The birthday mom was doing a party theme based on a book that featured a ladybug and a bumblebee, so the cakes I made coordinated with the theme. It was a small family only gathering, so she didn't want anything too large.
The bodies were made using a dome shaped pan and the heads are cupcakes. The bumblebee's wings are made from cardstock. The cake was vanilla butter cake with standard American buttercream.
I achieved the look of these cakes by using cupcakes and a specialty pan that I found the week before at All in One Bake Shop. I've said it once, and I'll say it again, I don't normally like to use specialty pans because they're one hit wonders; you can only usually them for one character or design. There are some though, that a baker should get and have in their personal stock for specialty cakes. This dome shaped pan is perfect because it can be used to create many different things.
This dome pan is actually about 5" diameter; that's a regular teaspoon next to it for scale. And it's a true dome, so you have to be careful about balancing it in the oven or you might have some spillage in the oven!
Because I only bought one pan (I had to make sure it would work), I had to bake and complete each cake separately which increased the amount of time I spent on baking. But it was worth it as I could have never achieved such a perfect dome by carving. Sometimes a specialty pan is worth the cost and cupboard space just to save some time and a little bit of frustration!
In the end, I think it was worth the $6 I spent on the pan as it made these smash cakes a breeze. And the mom was thrilled with the cakes as were the twins' older brothers!
Happy Baking,
Kelly
Labels:
Kids Birthday Cakes,
Portfolio,
Tools of the Trade
Sunday, January 10, 2010
Portfolio: Airplane Cake
Happy Sunday everyone!
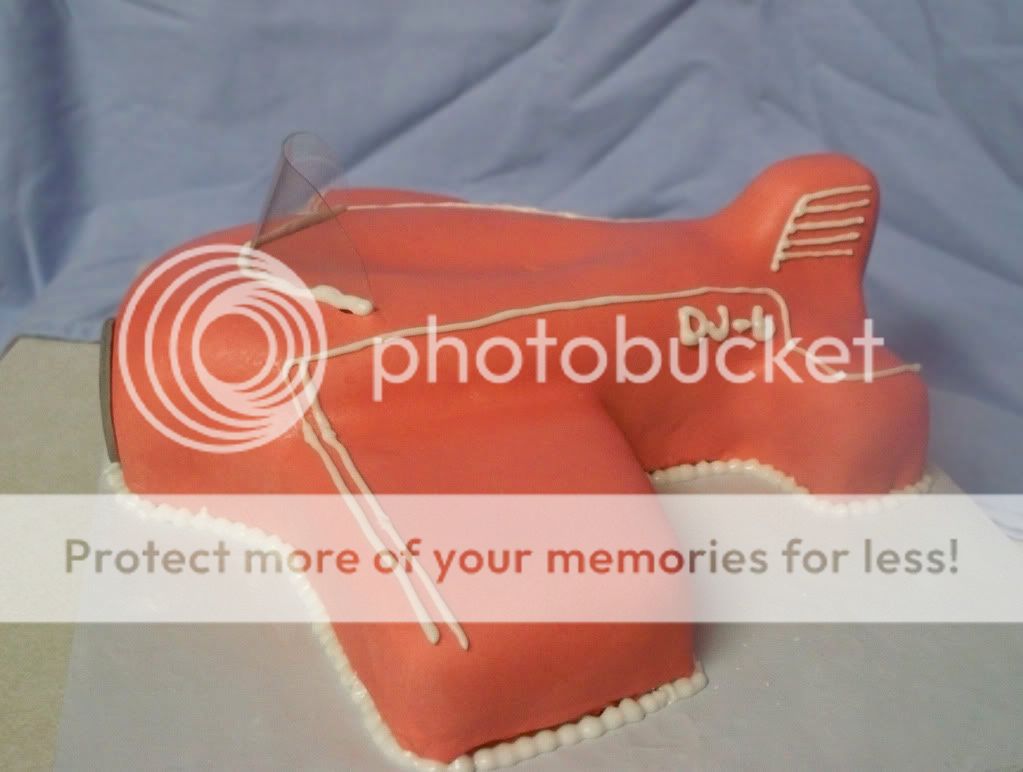
Today is the 6th birthday of DJ, a family friend. His mama and daddy surprised him by taking him to a viewing field to watch airplanes this morning and he had a great time. I made him an airplane cake to celebrate!
The inside of the cake is cookies and cream (I'll post the recipe in another post shortly, it's uber yummy!) and iced with cream cheese icing. I hadn't wanted to cover it in fondant, but trying to ice a sculpted cake with cream cheese icing is a little impossible. So at 11:30 last night, I made up a quick batch of marshmallow fondant and then called it a night. I finished the cake this morning and was much more happy with the results.
So, lessons learned on this cake: 1) don't ice a sculpted cake in cream cheese frosting...unless you like to inflict pain and frustration on yourself! 2) Cookies and cream cake is probably best done as a round or square cake. Other than that, it was pretty standard. I haven't made marshmallow fondant in awhile because a messy process and the last time I made it I had horrible tiny lumps in it, which made it almost unusable, but after my success on this round, I think I may mix up a few batches to have around and use in lieu of the Satin Ice, which can get expensive to buy and dries out way faster than MMF. We'll see!
Thanks for stopping by; I'll have some more cakes, recipes, and tutorials coming up soon!
Happy Caking!
Kelly
Today is the 6th birthday of DJ, a family friend. His mama and daddy surprised him by taking him to a viewing field to watch airplanes this morning and he had a great time. I made him an airplane cake to celebrate!
The plane "model" is a DJ-6; DJ's initials and his age!
The inside of the cake is cookies and cream (I'll post the recipe in another post shortly, it's uber yummy!) and iced with cream cheese icing. I hadn't wanted to cover it in fondant, but trying to ice a sculpted cake with cream cheese icing is a little impossible. So at 11:30 last night, I made up a quick batch of marshmallow fondant and then called it a night. I finished the cake this morning and was much more happy with the results.
So, lessons learned on this cake: 1) don't ice a sculpted cake in cream cheese frosting...unless you like to inflict pain and frustration on yourself! 2) Cookies and cream cake is probably best done as a round or square cake. Other than that, it was pretty standard. I haven't made marshmallow fondant in awhile because a messy process and the last time I made it I had horrible tiny lumps in it, which made it almost unusable, but after my success on this round, I think I may mix up a few batches to have around and use in lieu of the Satin Ice, which can get expensive to buy and dries out way faster than MMF. We'll see!
Thanks for stopping by; I'll have some more cakes, recipes, and tutorials coming up soon!
Happy Caking!
Kelly
Labels:
Kids Birthday Cakes,
Portfolio
Sunday, January 3, 2010
Portfolio: Abby Cadabby Birthday Cake
Today we celebrated the first birthday of Abby Lu, the daughter of an old coworker of mine. I contacted her mom some time back to ask if I could do Abby's first birthday cake and she jumped at it. Her original theme was candy, to symbolize how 'sweet' her daughter is, who is just the most darling little girl, second only to my own (hey, I'm allowed to be biased on my own blog, thankyouverymuch!). But later she changed it to Abby Cadabby, which is also just as cute.
This one really stumped us however, as we weren't sure what she wanted for a cake design. Anna was certain however that she did not want a character shaped cake which was fine by me. I just kept it in the back of my head until I found something I liked. Then I saw a design for a fun and funky wedding cake that was three tiers with the top tier as a giant cupcake. The colors were the same as Abby Cadabby and it was simple, but elegant. I sent the picture to Anna, who loved it. Houston, we have inspiration!
Here is a picture of the original cake:
And here is what I created:
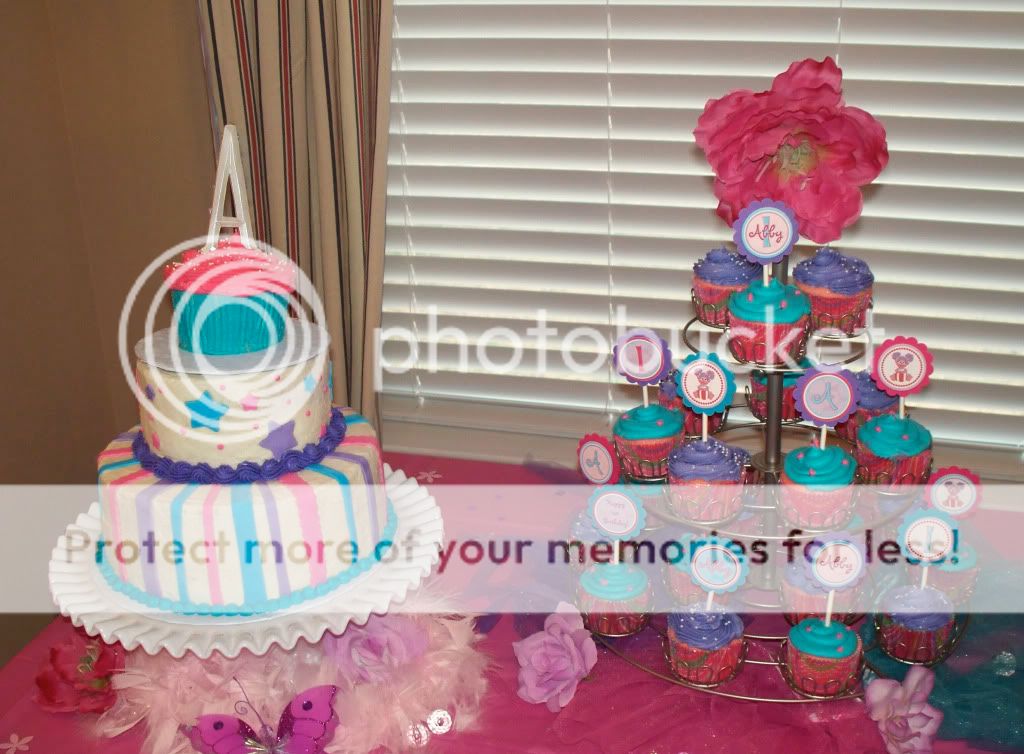
I made the smash cake separate for easier smashing and sprinkled it with white sprinkles. The stripes covered the whole bottom tier as opposed to just the sides like the inspiration cake and I used a wavy edge pastry cutter to add some more texture and dimension. I changed the dots into stars to fit better with the fairy nature of Abby Cadabby, nixed the big bow and altered the color choices slightly. The topper is an unfinished wood letter from Michael's which I painted pearl white and adorned with sparkly gems I had laying around. Anna had a large crowd coming to the party, so I also made three and a half dozen cupcakes for her as well (truthfully, it was closer to five dozen cupcakes to account for any size fluctuations and quality control).
Anna loved it and her daughter even more so. Here's the little tyke with it:
Seriously, is she just not the cutest thing you've ever seen? Ok, well maybe second cutest. You sure can't beat this:
This cake was a lot of fun to make and went over well. I used a chiffon cake recipe instead of my traditional butter cake because I was out of milk and unable to get to the store. I think it was a good choice overall. If you're interested in more info on the chiffon cake, check out my notes!
Happy birthday Abby Lu...may you have many more ahead of you!
Happy caking,
Kelly
Here's a picture of Abby Cadabby...isn't she adorable?
This one really stumped us however, as we weren't sure what she wanted for a cake design. Anna was certain however that she did not want a character shaped cake which was fine by me. I just kept it in the back of my head until I found something I liked. Then I saw a design for a fun and funky wedding cake that was three tiers with the top tier as a giant cupcake. The colors were the same as Abby Cadabby and it was simple, but elegant. I sent the picture to Anna, who loved it. Houston, we have inspiration!
Here is a picture of the original cake:
(I apologize sincerely because I didn't bookmark where I'd found it or who made it, so if you are the creator and happen upon this little blog of mine, please let me know and I will happily credit you UPDATE: Thanks to my friend Victoria, we discovered this cake was originally made by Perfect Endings Bakery and was featured on Cake Wrecks!)
And here is what I created:

Anna ordered some cupcake toppers off Etsy which we placed on the cupcakes. And her decor was amazing!
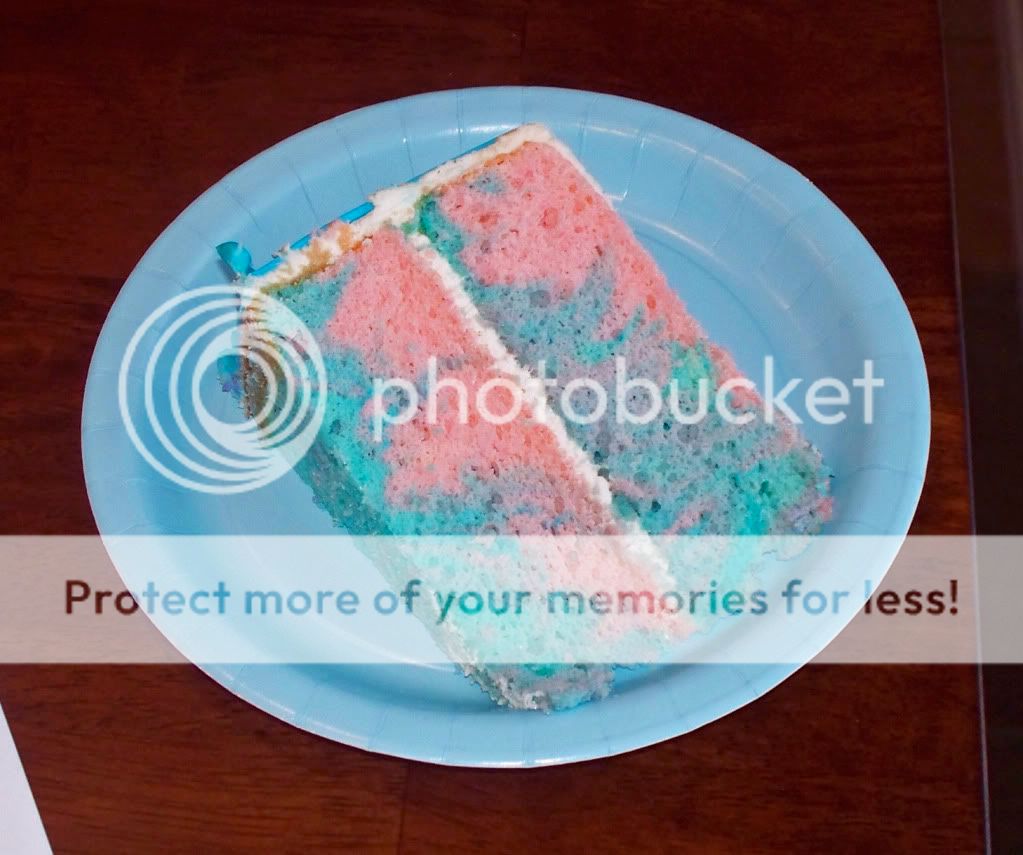
I swirled the interior with pink and sky blue, which created some purple parts as well. Yummy!
I made the smash cake separate for easier smashing and sprinkled it with white sprinkles. The stripes covered the whole bottom tier as opposed to just the sides like the inspiration cake and I used a wavy edge pastry cutter to add some more texture and dimension. I changed the dots into stars to fit better with the fairy nature of Abby Cadabby, nixed the big bow and altered the color choices slightly. The topper is an unfinished wood letter from Michael's which I painted pearl white and adorned with sparkly gems I had laying around. Anna had a large crowd coming to the party, so I also made three and a half dozen cupcakes for her as well (truthfully, it was closer to five dozen cupcakes to account for any size fluctuations and quality control).
Anna loved it and her daughter even more so. Here's the little tyke with it:
Seriously, is she just not the cutest thing you've ever seen? Ok, well maybe second cutest. You sure can't beat this:
Sybilla thoroughly enjoyed the party too!
This cake was a lot of fun to make and went over well. I used a chiffon cake recipe instead of my traditional butter cake because I was out of milk and unable to get to the store. I think it was a good choice overall. If you're interested in more info on the chiffon cake, check out my notes!
Happy birthday Abby Lu...may you have many more ahead of you!
Happy caking,
Kelly
Labels:
Kids Birthday Cakes,
Portfolio
Saturday, December 12, 2009
Portfolio: Sock Monkey Cake
Happy Saturday! Today we celebrated the first birthday of my cousin Jeff's twin boys, Wyatt and Garrett. Their mom, Abbi, asked me to make a cake centered around a monkey theme, specifically sock monkeys. If you're not familiar with sock monkeys, these vintage stuffed critters derive their name from the sock material used to make them. The shape of socks contributes to their unique shape as well.
We opted not to make a sock monkey shaped cake, but instead a two tiered primary colored cake with two smash cakes with sock monkeys on them for the boys. Here's how it turned out:

And here is a close up of the smash cakes:

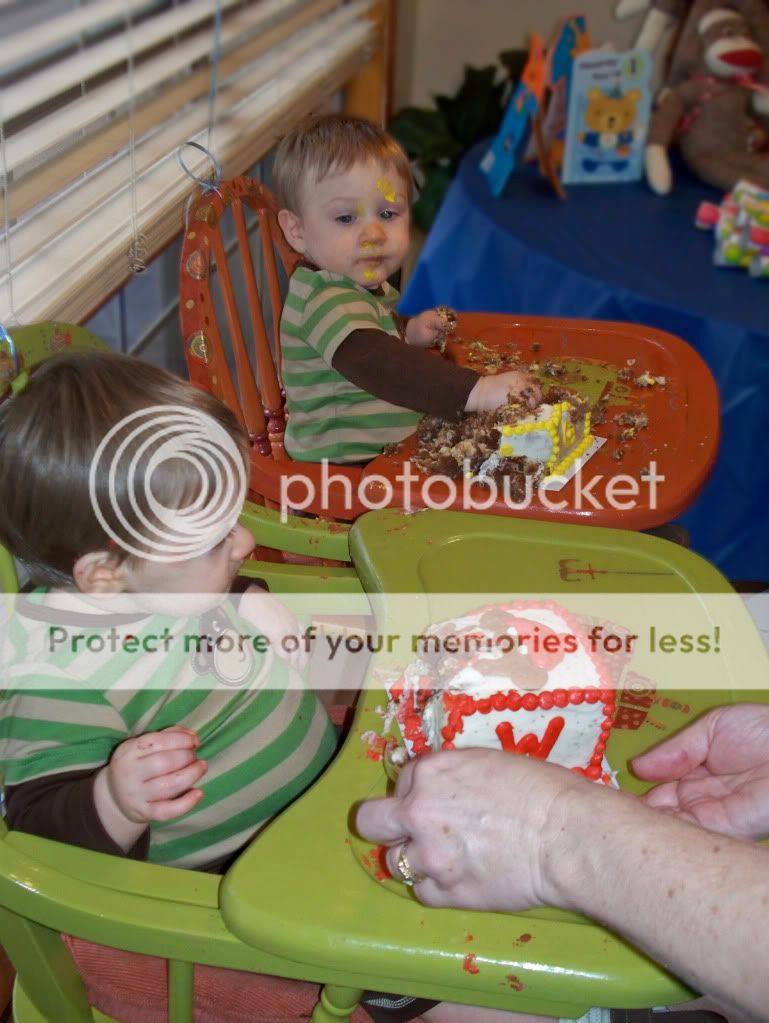
The boys may be identical twins, but they are as different as can be! Wyatt was neater than his brother and wasn't such a fan of the whole experience after a bit. His brother Garrett on the other hand, took the concept of "smash cake" to a whole new level!


All in all, it was pretty fun. I think I will post a tutorial later on how to do argyle patterns in buttercream, but I need to tweak my method a bit first. There weren't any problems in terms of executions with this cake, just some timing issues thanks to a wee little person who felt that they didn't need to go to bed, lol. Such is the life of a parent of a toddler!
Happy Baking,
Kelly
We opted not to make a sock monkey shaped cake, but instead a two tiered primary colored cake with two smash cakes with sock monkeys on them for the boys. Here's how it turned out:

And here is a close up of the smash cakes:

Each smash cake was a block with the first letter of their names on the sides and a sock monkey on top in a different color.
The boys may be identical twins, but they are as different as can be! Wyatt was neater than his brother and wasn't such a fan of the whole experience after a bit. His brother Garrett on the other hand, took the concept of "smash cake" to a whole new level!

Dude...you gonna eat that?

Wyatt preferred to share his cake with the dog!

What's everybody looking at?
All in all, it was pretty fun. I think I will post a tutorial later on how to do argyle patterns in buttercream, but I need to tweak my method a bit first. There weren't any problems in terms of executions with this cake, just some timing issues thanks to a wee little person who felt that they didn't need to go to bed, lol. Such is the life of a parent of a toddler!
Happy Baking,
Kelly
Labels:
Kids Birthday Cakes,
Portfolio
Saturday, December 5, 2009
Portfolio: Barbie Cake
I have that Aqua song running in my head right now..."I'm a Barbie girl, in my Barbie world!" Ah, good times! The reason that song is playing in my head because I just finished my god sister's birthday cake. I did Mathilda's cake last year and there was no way her mom and I were going to sway her into doing something other than a Barbie cake!
As far as inspiration goes, I had no idea what I was going to do, so long as it wasn't the doll body stuck in the cake and then decorated to look like a dress. It's not that it's a terrible idea; it's genius actually. It's just that there are so many bad ones out there that I didn't want to run the risk of contributing my own version. I have to laugh though, when I was doing initial research I saw nothing but the damn dress cakes! Mathilda didn't want the dress cake thankfully, but because she's obsessed with Project Runway right now, she decided to sketch me a design of what she wanted. Sadly, my scanner isn't working otherwise I'd show you what she did. Instead, you get to see the reality of that sketch:
As far as inspiration goes, I had no idea what I was going to do, so long as it wasn't the doll body stuck in the cake and then decorated to look like a dress. It's not that it's a terrible idea; it's genius actually. It's just that there are so many bad ones out there that I didn't want to run the risk of contributing my own version. I have to laugh though, when I was doing initial research I saw nothing but the damn dress cakes! Mathilda didn't want the dress cake thankfully, but because she's obsessed with Project Runway right now, she decided to sketch me a design of what she wanted. Sadly, my scanner isn't working otherwise I'd show you what she did. Instead, you get to see the reality of that sketch:
In a nutshell, she told me she wanted three tiers, with the bottom layer dark blue with yellow hearts, the middle tier white with red flowers, and the top tier pink with Barbie in a pink dress. Truly, I would not have imagined a Barbie cake to look like this. I originally had my doubts about her color scheme, but I thought, "Enh. What the hell? It's her cake!" Amazingly, it all worked out! The blue is actually more of a denim color which looks really beautiful with the yellow, red, white and pink. I got a little creative with the border colors and added my own touch there.
There are only going to be eight or ten kids at the party and I didn't want to let Mathilda down with a non-tiered cake, so I made each tier one layer instead of two or three. I torted them as well to give them a little bit more height as well. Barbie was made from fondant which I cut freehand and painted on her face. Not my best, honestly, as Barbie is looking a little haggard and has a double chin...oops! Something else of note: I used an American buttercream and I added shortening (which I almost never do because the taste and texture are awful), but I used Spectrum brand instead of Crisco. The latter is full of hydrogenated oils which are terrible for you and I never liked the taste. Spectrum added a nice sheen and softness to the buttercream which I think contributed to the ease of decorating. In addition, after it had crusted, it didn't crack like the Crisco kind.
I am so excited for Mathilda to see her cake tomorrow; she is one smart cookie and her design came out beautifully despite my initial reservations. Just goes to show, we need to pay more attention to kids!
Happy Baking,
Kelly
Labels:
Kids Birthday Cakes,
Portfolio
Monday, October 26, 2009
Portfolio: Wiggles Birthday Cake
As mom to a toddler, I have to admit, we watch a lot of pre-school TV. I know all about Dora and Diego and we love love love Jack's Big Music Show and Ni Hao, Kailan and Elmo. But the Wiggles were something new entirely for me! Well, I figgered it out pretty quick since my friend Courtney asked me to make a Wiggles birthday cake for her son Conner's second birthday this weekend. I made Conner's Elmo first birthday cake for him last year, so of course I was delighted to bring birthday joy again!

My original idea was to do a rainbow and have the Wiggles' big red car driving on top, but then I saw a way cuter version that someone had made of the big car driving on a hill of a cake with a rainbow behind it, so I tried that instead so that I could scale the size down for the actual number of party guests. I've never actually done figurework before and thanks to a horrendous meltdown from my aforementioned toddler, I ended up making the Wiggles themselves out of wooden craft pieces because I didn't have time or enough fondant to sculpt them (since I couldn't go and get some more), but I DID sculpt the big red car from cake and fondant. I created the colored wheels by painting them with fondant colors and the rainbow behind the car is a dried and painted piece of fondant.
The base of the cake came out great, but I feel kinda crappy about the Wiggles and their car since they weren't what I wanted originally, but I think it came out great overall and Courtney and her family loved it. And the bonus is that now Conner has some Wiggles play pieces!
Happy Caking,
Kelly
Labels:
Kids Birthday Cakes,
Portfolio
Subscribe to:
Posts (Atom)


